Traceability: What is it, and Why is it Important in Testing of Materials?

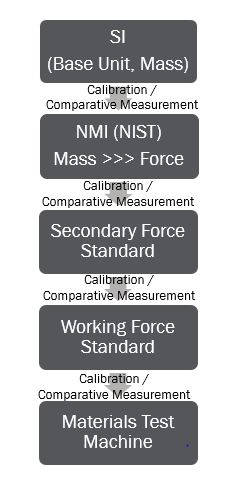
This chain allows traceable force measurements to be made beginning with an ASTM E74 “Secondary Force Standard”. A secondary standard is typically a device that has been calibrated by a National Metrology Institute such as NIST.
That standard is then used to calibrate the Working Force Standard reference (a second tier E74 device) which is subsequently used to calibrate a material test machine’s Force Measurement System (FMS).
As you can see, the full and completed chain can become quite long before it finally reaches a FMS in a Materials Test Machine (ASTM E4 tier). The longer this chain is, the more uncertainty is included in each of the successive calibration results and ultimately in your machines’ measurement results.
A Primary Force Laboratory such as Instron employs in house standards, similar to NIST’s, using Masses that are themselves traceable to the SI. This shortens the chain and significantly reduces the total accumulated uncertainty of the comparative measurement results made during a machines’ FMS calibration and the materials test results it produces.
Why is Traceability Important?
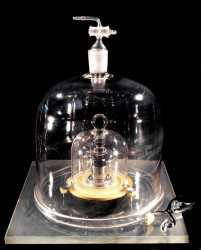
The International System of Units (SI) defines seven units of measure as a basic set from which all other SI units are derived. One familiar unit, the kilogram, is the base unit for the physical quantity mass. The kilogram is defined as being equal to the mass of the International Prototype of the Kilogram or IPK as it is commonly referred to. IPK, seen below, is in fact a cylinder composed of platinum and iridium. Seen next to IPK is K20. K20 resides in Maryland at NIST and has been traceably calibrated against IPK. Thus, we begin our chain of traceability!

International Prototype Kilogram (IPK)
BIPM (France)

K20
NIST (Maryland, US)